Pages

Subscribe:
Showing posts with label Blogspot Tutorial. Show all posts

Monday, February 13, 2012

Add Back To Top In Blogger Site

Today we’ll learn a very easy and important trick, Specially if you have got a lot of content on you blog pages, And if you want your blog to be easy to use for your visitors, A back to top link or button on your blogspot blog will make it easier and faster to your visitors when it comes to fast exploring and browsing.
Ad
Now we’ll see how to add
  • 1. Image Back To Top Buttons With 19 Different Styles
  • 2. Text Back To Top Link with different styles And Colors
1. Image Back To Top Buttons With 19 Different Styles
Step 1
Ok, now go to your blogger account and go to, Dashboard >> Layout >> Edit html >> and please find the following code.

 ]]></b:skin>

And before it add this code
 
 #backtotop {
padding:5px;
position:fixed;
bottom:10px;right:10px;
cursor:pointer;
}
 
Step 2
Now find the following code.
 
</body>

and before it add the next code.
 
<a href="#" id="backtotop"><img src="Image-Url" alt="back to top" /></a>  

But before adding this code to your template please choose your favorite button of the following And change the words in red, Image-Url to the button url.
back to top For Blogger
 
https://blogger.googleusercontent.com/img/b/R29vZ2xl/AVvXsEii7H6mKiUmugs_iKR19sU9uI37KU1_tOh53vu-Bpn6AJJpua5nfAqn33HLN2r1pfQyLl3i3B1cQjMPUtEaOaSbYwcsa6W3Cj7gvJF-Ko8BPNC5BWn4H6iuG1Ei5OiRBfAMC2xNZB7ryM-h/s1600/bttp-5.png
 
back to top For Blogger
https://blogger.googleusercontent.com/img/b/R29vZ2xl/AVvXsEjfRYDtW5PdXktc5UGfb1CGum1IrsM07TNPl_s0jah8Z-u52-k2ZNEd_6x7OUcAq4hfQXWovNw8AQErLmZEXgBPnF2EgnvvT-ecXiGyvxy-nivsZJ_Tet4mzLxbhAqogR-gFgb09dFPSNpL/s1600/bttp-4.png
 
back to top For Blogger
https://blogger.googleusercontent.com/img/b/R29vZ2xl/AVvXsEh1i64zBlsk69WjBt9UWc0mGruMqBpjBX9zdDa2DmpLqLKVimaqGjbk4OGoHJTR-ldTbukzLjLGXXSRBcv0TjlHR_GG6FGNWFbUmGJSIPvmWcwu5gXzU6ozqZdHaGrKOplVcqacHqX_l9u-/s1600/bttp-3.png
 
back to top For Blogger
https://blogger.googleusercontent.com/img/b/R29vZ2xl/AVvXsEjbY7nnVKrMJRALPGChMFlI3NHeGaNF6wdA3lZ-OS6dSNJVKl6WxI3lcLDswYqkDIwBc8eo2sRRUYM3kyrrVRXlUaPHXj066GdxlJ9dmfSlBjUhYWSB8b6uP9uRylCwGTa4ilOWhLaGMWyE/s1600/bttp-1.png
 
back to top For Blogger
https://blogger.googleusercontent.com/img/b/R29vZ2xl/AVvXsEgstmsgLMnOwftsxM7AcuN1qyno-E0QuSlWX4mhC-Qhcf3umyC5Y_CI9mcSbZCohr7sEur7WkGDlVwJv-8m8w2lsCVr264hLtOpTlj72W42zjUWASKFK0LBZlmTkSPj3yk_G0b_uFsYEpe-/s1600/bttp-2.png
 
back to top For Blogger
http://4.bp.blogspot.com/_JwD5r652h00/SvDBBZGgr-I/AAAAAAAAAQg/1X96vgeWqaw/s400/bttp-6.png0/bttp-7.png
 
back to top For Blogger
https://blogger.googleusercontent.com/img/b/R29vZ2xl/AVvXsEhZYYSWQhlorqqC1BDXUBQMhdrv3rZDUBloyQgtMShNMuR4eqkpw-Fzw8w_FzcoBLtO-4LI19pBENsrB_-yW4Qp72uZ-7CUzanxHCm_WHQAz_RRCzVL79sQK3JLs0AJ07LkWWYusNh1gICW/s400/bttp-10.png
 
back to top For Blogger
https://blogger.googleusercontent.com/img/b/R29vZ2xl/AVvXsEjdj7hZ8HBlr_dxME5D0ExMuvo9qnaKV2OPdW-Jq60CX4Oa7Hv4czQ2FgPj2M42gr5lJlvPulViXAhF03-zj4uEVEizNl-KJpqNVmFR9vZ9viy8z4_HJIU3dOXAEDgniyAl3ZQqeMAcPdoq/s400/bttp-9.png
back to top For Blogger
https://blogger.googleusercontent.com/img/b/R29vZ2xl/AVvXsEgk0NOUIIJWO63bbl4YSnS4DQPCgx3atH95MshRskNTlbbvLl48YOECCXGGDXblDCUQfs2fOeDxgz-mNlFGNl82TMxeYZJL6rgJ827fwGGTxieyPz5fpJaA9i86xGmL8b7mDfuNon9AWVs6/s400/bttp-8.png
back to top For Blogger
https://blogger.googleusercontent.com/img/b/R29vZ2xl/AVvXsEhnWJh8yBwyqfztYA1yCprwE3ncl3KHuUsoU_FfutXpHkLfpCCWcYhXShSitAWkLboGCXJ7C8tXXhjwVCJOD82GfijiIFcfD-XXGBOywChyphenhyphenSfrtTFDFx0uLFKYJV3kpQK2941E5Nf5N3nlR/
 
back to top For Blogger
https://blogger.googleusercontent.com/img/b/R29vZ2xl/AVvXsEgDaZiPfeK_omM-eoDne_ZTIosoCvft50qs1rpk-p_i5DWwFxw_DprPl7Bk21s0EB-W6DXvTcgoIn032Llk2_ao4OA9TnledYmsw8ngE7iBNEEZaNnRHkdz7FYXory9-W1AZ5AYe-NK1QRN/s400/bttp-11.png
 
back to top For Blogger
https://blogger.googleusercontent.com/img/b/R29vZ2xl/AVvXsEjLtpxhmMb_xPIp_f6dKhY9NxhhFL-ytd79doPUqmzVzfjx93zbiK86yGEfYBat88CH_pVJgoumREwngrNqhyphenhyphenGSeq2C8xtmNDzLHmTv9oVWEU7syAL0ykaAFUs2fdLEZEDZGSkYGZi3oiPG/s400/bttp-12.png
 
back to top For Blogger
https://blogger.googleusercontent.com/img/b/R29vZ2xl/AVvXsEim3n2MJ17oPXR0I2pV34EYG66LCK4CJVkrVVhIohCv0plxnXr7mafr7oEzKketaiCBD2Ya4rX3q7c8zK3HNEFlyjPDF457Nn1Lpi3T1I4U8iERbBUOLpKOiQ0xxczyj2EFtMoIZ0lM9Kny/s400/bttp-13.png
 
back to top For Blogger
https://blogger.googleusercontent.com/img/b/R29vZ2xl/AVvXsEjQoB6apQ5K_p1O20N2y8PB-oLWTg4cL_FCpZOjPq1APrXTRmElJx9NAyjiKB7RtNhH700-gTiWqtHkht0GKkFijdnXdH-KChSnakdYnTUMzr_xStwxFd_-k8AlV4d4fLg3uMBwO5qZ7E9P/s400/bttp-14.png
 
back to top For Blogger
https://blogger.googleusercontent.com/img/b/R29vZ2xl/AVvXsEg1AgYsQqT7H-jDdDCvA7a8ranFGRpZL5lGNOgdRhuZ1cRPHTDZUGM1hOE8A6KN6QHtieI_EjmBUNrq7_Dzx8LuNBRg2MqT0MiYcXyETf_vMcrqo-Hm2m9DHtyq67MSD6OG1eYqrCK5M9M8/s400/bttp-15.png
 
back to top For Blogger
https://blogger.googleusercontent.com/img/b/R29vZ2xl/AVvXsEj1FkEZyFkDQBfsFZWZ0zrnpOcGDI1ymIQqwfW8u6LB2i1DQeHAHl46Dv1xhxF9uSCEUkfphJXJgQE3etfx5PX2Q8YGK5DsnoJduH2N1gvbsHCTqjwN5fFBdcDS4yAd90v-t-qUcYBejQtd/s1600/bttp-16.png
 
back to top For Blogger
https://blogger.googleusercontent.com/img/b/R29vZ2xl/AVvXsEhsdImqHv2vtvpg77fcdDBoRdjFUC57BQ8EhAeFF7X5kFo-3t14neeCBMmdZlF7AwbJZ3phczcF26hbu-s8gYEVCbFK_MfLCcF9IoBDh4oQlfzMoQQPY_1loiyWzNrIhBJw-beUWbdhVG5A/s400/bttp-17.png
 
back to top For Blogger
https://blogger.googleusercontent.com/img/b/R29vZ2xl/AVvXsEh4NX7UIukbGdQv0LiHKKRLh3-s4uSB4fk0ZnBXPAl-TsZLXJOgp6gyDRY0MqjydbZUCEMrgK-wbjxjOXZklCGqVY5GAGTITkzuF5iOYGji_bSGyqynFg2uJeWzy98KVwlkJxHFZBR_4dbS/s400/bttp-19.png
 
back to top For Blogger
https://blogger.googleusercontent.com/img/b/R29vZ2xl/AVvXsEh4fruNXB8OR11TvrUkra-3HlJ8WbqBxJNLRAuqI11tdLDkYUGIsTZOp0h5dtM9pGkNFFuy56C0JnzNua6vwVM6EKE0nRUVZe6-ZXwrG-gkZyluwW89lMkw0eBMxP9XhRb2GknHnXO0od4z/s400/20.png
 
After Replacing the Image-Url with your favorite button url, it should looks like this

<a href="#" id="backtotop"><img src="https://blogger.googleusercontent.com/img/b/R29vZ2xl/AVvXsEh4fruNXB8OR11TvrUkra-3HlJ8WbqBxJNLRAuqI11tdLDkYUGIsTZOp0h5dtM9pGkNFFuy56C0JnzNua6vwVM6EKE0nRUVZe6-ZXwrG-gkZyluwW89lMkw0eBMxP9XhRb2GknHnXO0od4z/s400/20.png" alt="back to top" /></a> 

paste it into your template code,
 
Step 3
Find the following code
 
<head>

And paste this code after it.
 
&lt;script src='http://ajax.googleapis.com/ajax/libs/jquery/1.3/jquery.min.js'
type='text/javascript'&gt;&lt;/script&gt;
&lt;script language=&quot;javascript&quot;&gt;
$(window).ready(function(){
$('#backtotop').click(function(e){
e.preventDefault();
$('html, body').animate({scrollTop:0}, 'slow');
});
});
&lt;/script&gt;

and then click Save Template 

And you are done.
2. Text Back To Top Link with different styles And Colors
 
Step 1
Ok, now go to your blogger account and go to, Dashboard >> Layout >> Edit html >> and please find the following code.
 
 ]]></b:skin>

And before it add this code
 
#backtotop {
width:100px; /* Change Box Width*/
background:#F4FFBF;  /* Change background color*/
border:1px solid #ccc;  /* Change Border Style*/
text-align:center;
padding:5px; 
position:fixed;
bottom:10px;right:10px;
cursor:pointer;
color:#666; /* Change text color*/
text-decoration:none; 
}

And please change it’s properties to fit and blend with your blog template,
Change 100 to lower or higher number to increase or decrease the size of the box.
Change 1px To change the border width.
Change #ccc to your favorite color code change the border color.
Change F4FFBF to your favorite background color code.
Change 666; to your favorite Text color code.


Step 2
Find the following Code :

</body>
 
And before it, Paste the following code.

<a href="#" id="backtotop">Back to top</a>
 
To change the text on the button, just change Back to top to what ever you want,

Step 3
Find the following code

<head>
 
And paste this code after it.

&lt;script src='http://ajax.googleapis.com/ajax/libs/jquery/1.3/jquery.min.js'
type='text/javascript'&gt;&lt;/script&gt;
&lt;script language=&quot;javascript&quot;&gt;
$(window).ready(function(){
$('#backtotop').click(function(e){
e.preventDefault();
$('html, body').animate({scrollTop:0}, 'slow');
});
});
&lt;/script&gt;
 

and then click Save Template 

And you are done.
read more "Add Back To Top In Blogger Site"

Create Table Of Content/Index For Your Blogspot Site

Hi See my tutorial to make an index for your site.

At first go to blogger.com then go to post.
Click on new page. Then go to HTML tab. now follow the screenshot below:


Here is the following code:


<div dir="ltr" style="text-align: left;" trbidi="on">
<script src="http://abu-farhan.com/script/acctoc/daftarisiv2-pack.js">
</script>
<script src="http://www.allitemz.blogspot.com/feeds/posts/summary?max-results=1000&amp;alt=json-in-script&amp;callback=loadtoc">
</script>
<script type="text/javascript">
var accToc=true;
</script>
<script src="http://abu-farhan.com/script/acctoc/accordion-pack.js" type="text/javascript">
</script></div>


change the website address. Then publish.

Thank You !!!
read more "Create Table Of Content/Index For Your Blogspot Site"

Sunday, February 12, 2012

Add a Flying Twitter Bird To Your Blogspot Blog

With Twitter's worldwide popularity and with over 200 million users, generating 65 million tweets a day, it has become a must for every web master to use twitter sharing buttons and applications as much on his web as possible. This lets users to easily  tweet our blogs and websites which thereby generates traffic for us in return. Harish of way2blogging has coded a beautiful cute twitter bird that flies from corner to corner of your web page as you scroll up or down. It has a follow me link as well as tweet link. It is compatible with all browsers.


How To Add the Twitter Flying Bird To Blogger?

  1. Go To Blogger > Design > Edit HTML
  2. Backup your template
  3. Search for </body>
  4. And just above it paste the code below

<script src='http://bloggerblogwidgets.googlecode.com/files/way2blogging.org-tripleflap.js' type='text/javascript'>
</script>
<script type='text/javascript'>
var twitterAccount = &quot;Allitemz&quot;;
var tweetThisText = &quot; <data:blog.pageTitle/> : <data:blog.url/> &quot;;
tripleflapInit();
</script>

   5.  Replace Allitemz with your twitter account username.
    6.  Save your template and you are done!
    7.   View your blog to see it flying. :)

If you faced any problem just let me know. Have fun!
read more "Add a Flying Twitter Bird To Your Blogspot Blog"

Add Social Connect Widget To Blogspot


Adding The Social Connect Widget To BlogSpot
  1. Go To Blogger > Design > Edit HTML
  2. Backup your template
  3. Search for ]]></b:skin>  and paste the following code just above it, 
  4.  
/*  -------------MBT SOCIAL SHARE WIDGET-------------------- */
#search{width:350px; border:1px solid #E0DFD9;background:url(https://blogger.googleusercontent.com/img/b/R29vZ2xl/AVvXsEgh36RJyEqlpjxV3okKyqY4EZ7ABPiL6sINXvjHE56Fl3CI3D4sGmul2CdRghIUVZDmv3dbSNXOBk6O25oRmE8pl_KtDtIX6NG2_CMWXgu4bGGQlgLn4JDIzjgII_MLG4sqBMnCA4JbW3U/s1600/search-bg.png) left top repeat-x;height:32px;padding:0;text-align:left;overflow:hidden}
#search #s{width:80%; background:none;color:#3F3F3F;border:0;padding:4px;margin:3px 0 0 12px;float:left}
#search .search-image{border:0;vertical-align:top;float:right;margin:8px 4px 0 2px}
#search-wrap{padding:15px 0}
.topsearch #search{margin-top:0;margin-bottom:10px}

.social-connect-widget{background:#FFF;border:1px solid #E7E6DE;padding:10px}
.social-connect-widget:hover{border:1px solid #CBCBC2;background:#F5F4EF}
.social-connect-widget a{text-decoration:none;font-weight:bold;font-family:Arial,Helvetica,Sans-serif;color:#4B4D4E}
.social-connect-widget a:hover{text-decoration:underline;color:#F77C04}
.social-connect-widget img{vertical-align:middle;margin-right:5px}

  • To Change width of search box edit width:350px
  • To change width of search input area edit width:80%

     4.    Then Search for,
<div id='sidebar-wrapper'>
PS: In this part most of you will face problems as the coding for each template differ. If you could not find this code then do not panic and simply post your Blog URL in the comments.
     5.   Now Paste the following code just below it,
<div class='topsearch'>
<div class='clerfix' id='search'>
    <form action='/search' id='searchform' method='get'>
        <input id='s' name='q' onblur='if (this.value == &quot;&quot;) {this.value = &quot;Search here...&quot;;}' onfocus='if (this.value == &quot;Search here...&quot;) {this.value = &quot;&quot;}' type='text' value='Search here...'/>
        <input class='search-image' src='https://blogger.googleusercontent.com/img/b/R29vZ2xl/AVvXsEhkKgKbUQRAqbofLv058zOj7WkQ2ZP7BwUaZ8-uLxEQXl3NbvriNcmSZ1lZau9skPbr2fIpuca_C5RXK5eCPI7hEQKP7NH4P2t8Lw-AlYjf3xaIaQuFOXyQSjPp74vuByGFa1eaa0_bVuU/s1600/search.png' title='Search' type='image'/>
    </form>
</div>
</div>
<div style='clear:both;'/>
<div class='social-connect-widget' style='margin-top:0px;margin-bottom:10px;'>
<a expr:href='data:blog.homepageUrl + &quot;feeds/posts/default&quot;'><img alt='RSS Feed' src='https://blogger.googleusercontent.com/img/b/R29vZ2xl/AVvXsEj6bRxd_CETbNlUYpozNyp1nJOal0Td3_oqtX_g1oCZWpk0Z_EEXBgMCf36_AuRRXGHmXlUsvtPVz6hbJtaer-uE345e1iegVmN0hV_ZZmYEzADRfr0kHR__UTjd3Q3XXbS0TPF1XU9TfEu/s1600/social-connect-rss.png' title='RSS Feed'/></a><a expr:href='data:blog.homepageUrl + &quot;feeds/posts/default&quot;'>Subscribe to our RSS Feeds!</a>
</div>
                       
<div class='social-connect-widget' style='margin-bottom:10px;'>
<a href='http://twitter.com/USERNAME'><img alt='Follow Us on Twitter!' src='https://blogger.googleusercontent.com/img/b/R29vZ2xl/AVvXsEgKy1qatTvdZcoE3pXfxO3PEOo6jm_kK1VsJjPzvFVPkTBzYTqd-gC_aZPCK1Ybax10UWWNb1ST6RXJFiaIUhG-MB_xeUdDOuXv0geHk3MuR4wEomz_py4hrVq76RmMssCCt8uLTMKWxGP8/s1600/social-connect-twitter.png' title='Follow Us on Twitter!'/></a><a href='http://twitter.com/USERNAME'>Follow Us on Twitter!</a>
</div>
<div class='social-connect-widget' style='margin-bottom:10px;'>
<a href='http://facebook.com/USERNAME'><img alt='Be Our Fan!' src='https://blogger.googleusercontent.com/img/b/R29vZ2xl/AVvXsEj0afEaMMpw8nqJC7GPtC8j2XdqMfznPIAUuOIj67vJIFhODvlqLM5CbehEfy-8OJyMjZO2RiCQsWCsKRIGK7GlAcabc9-9PlwY2VA9GDzboNa-IadwnEhunuO9ib_FTL-fBQZSKpqP4_Dx/s1600/social-connect-facebook.png' title='Be Our Fan'/></a><a href='http://facebook.com/USERNAME'>Follow us on Facebook!</a>
</div>
<div style='clear:both;'/>
<div class='addthis_toolbox'>  
<div class='custom_images'>
<a class='addthis_button_twitter'><img alt='Twitter' height='32' src='https://blogger.googleusercontent.com/img/b/R29vZ2xl/AVvXsEiidE3frXIIamPZ81ch5-rTak1E8iQ_2Ov9L3CS8svA6fZFZuGK0ApEzinsTSS1YDM2wguyGlk6jW5pWAqpHeAzEmDPLVD1mPSYH0rR8sAF9iyqDI_KExWzM6h4r7BMtnY4f3-fGqECFhM/s1600/twitter.png' width='32'/></a>
<a class='addthis_button_delicious'><img alt='Delicious' height='32' src='https://blogger.googleusercontent.com/img/b/R29vZ2xl/AVvXsEh39il9Vp5inCz3Ru8H5cTgs5q6dvg8VQ3rMBgyyWqhcIzmWCs7BMSXOCHMJYRUMTrJhBnfdQzPsS6m2A59fJHSoRL8sL_xM-1bhHKH6K-25YPPa9ZvubhIyRPMe7_i4L_JeGxYvXJfI_g/s1600/delicious.png' width='32'/></a>
<a class='addthis_button_facebook'><img alt='Facebook' height='32' src='https://blogger.googleusercontent.com/img/b/R29vZ2xl/AVvXsEhIxdWAqtB6_Kbg9kkNVM3z9f0q8H14CItGHIZUEt8aY2VngUMlljBW68MDAaKcGigtDF82E4VQ0fDrMotp_n2LaUsKuHyf9YHxRb2T2leFpM8L80G0vMLUEwrcquUus0fCZJuU7Xq7d64/s1600/facebook.png' width='32'/></a>
<a class='addthis_button_digg'><img alt='Digg' height='32' src='https://blogger.googleusercontent.com/img/b/R29vZ2xl/AVvXsEidTVmBpvxyNE4RzLY7cN8f6f9yVIl87IajQjTvC3JgtV2zWgvPr-4uwOsTgcIYzcA7mVcbmAaBH1wZyWyh4ZCZFpbWQsRg1tVQAbYvhvBKhqqlXLNpx3Ky8DXZnFMrvYLQGnoGUpRnzIo/s1600/digg.png' width='32'/></a>
<a class='addthis_button_stumbleupon'><img alt='Stumbleupon' height='32' src='https://blogger.googleusercontent.com/img/b/R29vZ2xl/AVvXsEjN296143Nyv8bM0F30Bu9uzaGqeUphdruJKDuDSBVzGka55fLuFK4g9ioVWs03VoIVfj7SsM5onwxPJAF3o2HYA2MoTegUKlxJ1rKYcwAwOpcd1EqhKcFZ0OX4lEv-PVOpdSzyBBrc0XA/s1600/stumbleupon.png' width='32'/></a>
<a class='addthis_button_favorites'><img alt='Favorites' height='32' src='https://blogger.googleusercontent.com/img/b/R29vZ2xl/AVvXsEio7EFVuAUY_bkvv087jrUg8hRZJ0IfAV2SV7ZejvG4tfZHBDlNvzRQYvibjPTO6cRTUdEGCfoBx48nd7ci4YVlbI05ikXDpwp1QS_7mgMsqp7JUg6TG-lKZuEhpoISeMLG3P6d8cuTrzY/s1600/favorites.png' width='32'/></a>
<a class='addthis_button_more'><img alt='More' height='32' src='https://blogger.googleusercontent.com/img/b/R29vZ2xl/AVvXsEjlmcnhzsFtWUJRicgdd1HMNyb0xQPuGcbWw1CK5revOWW-zZvixNWR65MCj6yOenxuEwtE_bAPzq63mmC1oIufbfB9QShTbJtipDxVFK_LK8KclL12uiJf_bbvyR1ldrm-6CjeF8v-3Ps/s1600/more.png' width='32'/></a>
</div>
<script src='http://s7.addthis.com/js/250/addthis_widget.js' type='text/javascript'/>
</div>
<div style='clear:both;'/>
Make these changes:
  • Replace http://twitter.com/USERNAME with your twitter profile link
  • Replace http://facebook.com/USERNAME with your Facebook Profile link
      6.   Save your template and Bingo you are done! :>
Visit your blogs to see a beautiful new change. Hope you liked it. Questions are always welcomed.
You will also like to view the previous version,
read more "Add Social Connect Widget To Blogspot"

Add Like Button In Every Post Of Your Blogspot Blog

few days ago, face book surprised us by launching a lot of social plugins, one of them, actually the most popular one yet is the famous like button,
In this tutorial you’ll learn how to add it to your blogger blog.
and you’ll learn how to customize
  • change the verb, like or recommend.
  • change it’s color.
  • change it’s font.


Adding it to your template. The button code,

<b:if cond='data:blog.pageType == &quot;item&quot;'>
<iframe allowTransparency='true' expr:src='&quot;http://www.facebook.com/plugins/like.php?href=&quot; + data:post.url + &quot;&amp;layout=standard&amp;show_faces=false&amp;width=100&amp;action=like&amp;font=arial&amp;colorscheme=light&quot;' frameborder='0' scrolling='no' style='border:none; overflow:hidden; width:450px; height:40px;'/>
</b:if>
 
where to add it ?
Log into your blogger account, then go to Layout >> Edit Html.
Before doing any thing you must check Expand Widget Templates box.
And find the next Code

<div class='post-header-line-1'/>
 
And after it, paste your button code
What, If you didn’t find the code above in your template, The try to find the following,

<data:post.body/>
 
And paste the button code Before it.

click Save Template and you are done.

read more "Add Like Button In Every Post Of Your Blogspot Blog"

Floating Google +1, Facebook, Twitter Buttons For Your Blogger Like This Site

Adding Floating Social share Counters to Blogger


  1. Go To Blogger > Design
  2. Choose a HTML/JavaScript widget
  3. Paste the following code inside it,
<style>
/*-------MBT Floating Counters------------*/
#floatdiv {
    position:absolute;
    width:94px;
    height:229px;
    top:0;
    left:0;
        z-index:100
}

#mbtsidebar {
        border:1px solid #ddd;
        padding-left:5px;
    position:relative;
    height:220px;
    width:55px;
    margin:0 0 0 5px;
}
</style>


<div id="floatdiv">
<div id="mbtsidebar">
    <table cellpadding="1px" cellspacing="0">
    <tr>
    <td style="border-bottom: 1px solid #E8E8E8; padding:5px 0 2px 0;">
<div id="fb-root"></div><script src="http://connect.facebook.net/en_US/all.js#xfbml=1"></script><fb:like href="" send="false" layout="box_count" show_faces="false" font=""></fb:like>
    </td>
    </tr>
    <tr>
    <td style="border-bottom: 1px solid #E8E8E8; padding:5px 0px;">
<g:plusone size="Tall" expr:href="data:post.url">
    </g:plusone></td>
    </tr>
    <tr>
    <td style="border-bottom: 0px solid #E8E8E8; padding:5px 0 0px 0;">
<a href="http://twitter.com/share" class="twitter-share-button" data-count="vertical" data-via="allitemz">Tweet</a><script type="text/javascript" src="http://platform.twitter.com/widgets.js"></script>
    </td>
    </tr>
    <tr>
    <td style="border-bottom: 0px solid #E8E8E8; padding:0px 0 0px 0;">
<p style=" font-size:10px; text-align:center; color:#ddd;"><a style="color:#ddd;" href="http://www.allitemz.blogspot.com" target="_blank">Widgets</a></p>
    </td>
    </tr>
    </table>
</div>
</div>
<script type="text/javascript">
// JavaScript Document

   <!--
/* Script by: www.jtricks.com
* Version: 20071017
* Latest version:
* www.jtricks.com/javascript/navigation/floating.html
*/
var floatingMenuId = 'floatdiv';
var floatingMenu =
{
    targetX: 0,
    targetY: 300,
    hasInner: typeof(window.innerWidth) == 'number',
    hasElement: typeof(document.documentElement) == 'object'
        && typeof(document.documentElement.clientWidth) == 'number',
    menu:
        document.getElementById
        ? document.getElementById(floatingMenuId)
        : document.all
          ? document.all[floatingMenuId]
          : document.layers[floatingMenuId]
};
floatingMenu.move = function ()
{
    floatingMenu.menu.style.left = floatingMenu.nextX + 'px';
    floatingMenu.menu.style.top = floatingMenu.nextY + 'px';
}
floatingMenu.computeShifts = function ()
{
    var de = document.documentElement;
    floatingMenu.shiftX = 
        floatingMenu.hasInner 
        ? pageXOffset 
        : floatingMenu.hasElement 
          ? de.scrollLeft 
          : document.body.scrollLeft; 
    if (floatingMenu.targetX < 0)
    {
        floatingMenu.shiftX +=
            floatingMenu.hasElement
            ? de.clientWidth
            : document.body.clientWidth;
    }
    floatingMenu.shiftY =
        floatingMenu.hasInner
        ? pageYOffset
        : floatingMenu.hasElement
          ? de.scrollTop
          : document.body.scrollTop;
    if (floatingMenu.targetY < 0)
    {
        if (floatingMenu.hasElement && floatingMenu.hasInner)
        {
            // Handle Opera 8 problems
            floatingMenu.shiftY +=
                de.clientHeight > window.innerHeight
                ? window.innerHeight
                : de.clientHeight
        }
        else
        {
            floatingMenu.shiftY +=
                floatingMenu.hasElement
                ? de.clientHeight
                : document.body.clientHeight;
        }
    }
}
floatingMenu.calculateCornerX = function()
{
    if (floatingMenu.targetX != 'center')
        return floatingMenu.shiftX + floatingMenu.targetX;
    var width = parseInt(floatingMenu.menu.offsetWidth);
    var cornerX =
        floatingMenu.hasElement
        ? (floatingMenu.hasInner
           ? pageXOffset
           : document.documentElement.scrollLeft) +
          (document.documentElement.clientWidth - width)/2
        : document.body.scrollLeft +
          (document.body.clientWidth - width)/2;
    return cornerX;
};
floatingMenu.calculateCornerY = function()
{
    if (floatingMenu.targetY != 'center')
        return floatingMenu.shiftY + floatingMenu.targetY;
    var height = parseInt(floatingMenu.menu.offsetHeight);
    // Handle Opera 8 problems
    var clientHeight =
        floatingMenu.hasElement && floatingMenu.hasInner
        && document.documentElement.clientHeight
            > window.innerHeight
        ? window.innerHeight
        : document.documentElement.clientHeight
    var cornerY =
        floatingMenu.hasElement
        ? (floatingMenu.hasInner 
           ? pageYOffset
           : document.documentElement.scrollTop) +
          (clientHeight - height)/2
        : document.body.scrollTop +
          (document.body.clientHeight - height)/2;
    return cornerY;
};
floatingMenu.doFloat = function()
{
    // Check if reference to menu was lost due
    // to ajax manipuations
    if (!floatingMenu.menu)
    {
        menu = document.getElementById
            ? document.getElementById(floatingMenuId)
            : document.all
              ? document.all[floatingMenuId]
              : document.layers[floatingMenuId];
        initSecondary();
    }
    var stepX, stepY;
    floatingMenu.computeShifts();
    var cornerX = floatingMenu.calculateCornerX();
    var stepX = (cornerX - floatingMenu.nextX) * .07;
    if (Math.abs(stepX) < .5)
    {
        stepX = cornerX - floatingMenu.nextX;
    }
    var cornerY = floatingMenu.calculateCornerY();
    var stepY = (cornerY - floatingMenu.nextY) * .07;
    if (Math.abs(stepY) < .5)
    {
        stepY = cornerY - floatingMenu.nextY;
    }
    if (Math.abs(stepX) > 0 ||
        Math.abs(stepY) > 0)
    {
        floatingMenu.nextX += stepX;
        floatingMenu.nextY += stepY;
        floatingMenu.move();
    }
    setTimeout('floatingMenu.doFloat()', 20);
};
// addEvent designed by Aaron Moore
floatingMenu.addEvent = function(element, listener, handler)
{
    if(typeof element[listener] != 'function' ||
       typeof element[listener + '_num'] == 'undefined')
    {
        element[listener + '_num'] = 0;
        if (typeof element[listener] == 'function')
        {
            element[listener + 0] = element[listener];
            element[listener + '_num']++;
        }
        element[listener] = function(e)
        {
            var r = true;
            e = (e) ? e : window.event;
            for(var i = element[listener + '_num'] -1; i >= 0; i--)
            {
                if(element[listener + i](e) == false)
                    r = false;
            }
            return r;
        }
    }
    //if handler is not already stored, assign it
    for(var i = 0; i < element[listener + '_num']; i++)
        if(element[listener + i] == handler)
            return;
    element[listener + element[listener + '_num']] = handler;
    element[listener + '_num']++;
};
floatingMenu.init = function()
{
    floatingMenu.initSecondary();
    floatingMenu.doFloat();
};
// Some browsers init scrollbars only after
// full document load.
floatingMenu.initSecondary = function()
{
    floatingMenu.computeShifts();
    floatingMenu.nextX = floatingMenu.calculateCornerX();
    floatingMenu.nextY = floatingMenu.calculateCornerY();
    floatingMenu.move();
}
if (document.layers)
    floatingMenu.addEvent(window, 'onload', floatingMenu.init);
else
{
    floatingMenu.init();
    floatingMenu.addEvent(window, 'onload',
        floatingMenu.initSecondary);
}
//-->
</script>
Make these changes:
  • Replace allitemz with your Twitter username
     4.  Save your widget and you are almost done!
PS: If you have already added the Google +1 Button somewhere in your blog then you may skip step5.
    5.  Now Go To Blogger > Design > Edit HTML   and search for this,
</head>
Just above it paste the following code,
<script src='http://apis.google.com/js/plusone.js' type='text/javascript'> {lang: &#39;en-US&#39;} </script>
     6.  Save your template and say Bingo!
Visit your blog to find it hanging to the left. I hope you liked it as much as MBT had fun creating it. Peace and blessings! :)
read more "Floating Google +1, Facebook, Twitter Buttons For Your Blogger Like This Site"

Friday, February 10, 2012

Add Snow Effect On The Blogspot Mouse Cursor Area Like This Site

Hello! `How are you guys? Adding snow effect when you move the mouse cursor will change the look of your blog. here is the effect of fresh snow in your area simple mouse blog. This will make your blog more cold than snow falling from the mouse cursor. Effect is very simple gadget to use. So this is very fast. I tested this effect in Internet Explorer, Mozilla Firefox and many other web browsers. This simple and not flash based image works great! I hope you enjoy using this very cool snow effect gadget. So, let's see how to Add Snow Effect On The Mouse Cursor On The Blog..

make a snow effect on the mouse cursor on the blog


I have to write two set of instructions for each steps, as some of you are using the default layout, and some of you are using the new layout. So, let's see how to install this cool widget in your blog..


Step 1:


If you're using the old Blogger interface: Go to Dashboard - Design - Page Elements - Add a Gadget.


Add a Gadget of HTML/JavaScript type.


If you're using the new Blogger interface: Go to Dashboard - Layout - Add a Gadget


2.Click on 'Add a Gadget' on the sidebar.
3.Select 'HTML/Javascript' and add the one of code given below
4. Now Click On Save 'JavaScript' You are done.


<a href="http://allitemz.blogspot.com" target="_blank" title="Blogger Widgets"><img src="http://safir85.ucoz.com/24work-blogspot/cursor-24work-10.png" border="0" alt="Blogger Widgets" style="position:absolute; top: 0px; right: 0px;" /></a><script type="text/javascript">
// <![CDATA[
var colour="black";
var sparkles=100;

var x=ox=400;
var y=oy=300;
var swide=800;
var shigh=600;
var sleft=sdown=0;
var tiny=new Array();
var star=new Array();
var starv=new Array();
var starx=new Array();
var stary=new Array();
var tinyx=new Array();
var tinyy=new Array();
var tinyv=new Array();
window.onload=function() { if (document.getElementById) {
var i, rats, rlef, rdow;
for (var i=0; i<sparkles; i++) {
var rats=createDiv(3, 3);
rats.style.visibility="hidden";
document.body.appendChild(tiny[i]=rats);
starv[i]=0;
tinyv[i]=0;
var rats=createDiv(5, 5);
rats.style.backgroundColor="transparent";
rats.style.visibility="hidden";
var rlef=createDiv(1, 5);
var rdow=createDiv(5, 1);
rats.appendChild(rlef);
rats.appendChild(rdow);
rlef.style.top="3px";
rlef.style.left="0px";
rdow.style.top="0px";
rdow.style.left="3px";
document.body.appendChild(star[i]=rats);
}
set_width();
sparkle();
}}
function sparkle() {
var c;
if (x!=ox || y!=oy) {
ox=x;
oy=y;
for (c=0; c<sparkles; c++) if (!starv[c]) {
star[c].style.left=(starx[c]=x)+"px";

star[c].style.top=(stary[c]=y)+"px";
star[c].style.clip="rect(0px, 5px, 5px, 0px)";
star[c].style.visibility="visible";
starv[c]=50;
break;
}
}
for (c=0; c<sparkles; c++) {
if (starv[c]) update_star(c);
if (tinyv[c]) update_tiny(c);
}
setTimeout("sparkle()", 40);
}
function update_star(i) {
if (--starv[i]==25) star[i].style.clip="rect(1px, 4px, 4px, 1px)";
if (starv[i]) {
stary[i]+=1+Math.random()*3;
if (stary[i]<shigh+sdown) {
star[i].style.top=stary[i]+"px";
starx[i]+=(i%5-2)/5;
star[i].style.left=starx[i]+"px";
}
else {
star[i].style.visibility="hidden";
starv[i]=0;
return;
}

}
else {
tinyv[i]=50;
tiny[i].style.top=(tinyy[i]=stary[i])+"px";
tiny[i].style.left=(tinyx[i]=starx[i])+"px";
tiny[i].style.width="2px";
tiny[i].style.height="2px";
star[i].style.visibility="hidden";
tiny[i].style.visibility="visible"
}
}
function update_tiny(i) {
if (--tinyv[i]==25) {
tiny[i].style.width="1px";
tiny[i].style.height="1px";
}
if (tinyv[i]) {
tinyy[i]+=1+Math.random()*3;
if (tinyy[i]<shigh+sdown) {
tiny[i].style.top=tinyy[i]+"px";
tinyx[i]+=(i%5-2)/5;
tiny[i].style.left=tinyx[i]+"px";
}
else {


tiny[i].style.visibility="hidden";
tinyv[i]=0;
return;
}
}
else tiny[i].style.visibility="hidden";
}
document.onmousemove=mouse;
function mouse(e) {
set_scroll();
y=(e)?e.pageY:event.y+sdown;
x=(e)?e.pageX:event.x+sleft;
}
function set_scroll() {
if (typeof(self.pageYOffset)=="number") {
sdown=self.pageYOffset;
sleft=self.pageXOffset;
}
else if (document.body.scrollTop || document.body.scrollLeft) {
sdown=document.body.scrollTop;
sleft=document.body.scrollLeft;
}
else if (document.documentElement && (document.documentElement.scrollTop || document.documentElement.scrollLeft)) {
sleft=document.documentElement.scrollLeft;
sdown=document.documentElement.scrollTop;
}
else {
sdown=0;
sleft=0;
}
}
window.onresize=set_width;
function set_width() {
if (typeof(self.innerWidth)=="number") {
swide=self.innerWidth;
shigh=self.innerHeight;
}
else if (document.documentElement && document.documentElement.clientWidth) {
swide=document.documentElement.clientWidth;
shigh=document.documentElement.clientHeight;
}
else if (document.body.clientWidth) {
swide=document.body.clientWidth;
shigh=document.body.clientHeight;
}
}
function createDiv(height, width) {
var div=document.createElement("div");
div.style.position="absolute";
div.style.height=height+"px";
div.style.width=width+"px";
div.style.overflow="hidden";
div.style.backgroundColor=colour;
return (div);
}
// ]]>
</script>


And now click Save


# you can change :


var colour="black";

read more "Add Snow Effect On The Blogspot Mouse Cursor Area Like This Site"

Page Number Navigation For Blogspot Site

Today we will see how to add a nice page number navigation hack blogger. The default navigation links (i.e Older Posts) is not the friendly visitor if you are having a lot of jobs and bloggers readers.Few has some problems with the above script navigation page. Now here is a completely new script and work for numbered page navigation (i.e. Panigation) for Blogger. The paging widget for blogger it easy for the visitor. It is a must have for any new blogs.This new script allows you to add numbered page navigation to blogger/ blogspot blog with page numbers starting(1, 2, 3, 4 ….) like those of a book.


Add Numbered Page Navigation Widget With DIfferent Styles For Blogger / Blogspot


Page navigation widget for blogger is most popular widget, and most bloggers are using this. because these players are only provided in the wordpress blogs hosted or blogs.But now his trick has been made ​​available to bloggers is also here that I am giving this Page Navigation Widget with different styles and options for full customization.

Now go to Layout>Add a gadget>HTML/Javascript. Then paste the code below:

<style type="text/css">#blog-pager{font-size:normal}.showpageArea{font-family:verdana,arial,helvetica;color:#000;font-size:11px;margin:10px}.showpageArea a{color:#fff}.showpageNum a{padding:3px 8px;margin:0 4px;text-decoration:none;background:#333 url(https://blogger.googleusercontent.com/img/b/R29vZ2xl/AVvXsEjfD2rgSYw-xbD44UTW8pTBBP5eJEy4MUy4Cn3hYRJ-eJtA7lO8PSWsUekXxlguJp2-Cu8fMcbkWQNut9VH-vt0-o0rOUQMSc_9uBY7dqe2wxtiqdbyUi31njQpnHNzxMr58LY7AxdaLuU/s1600/wp5.jpg) 0 -50px repeat-x}.showpageNum a:hover{background:#666 url(https://blogger.googleusercontent.com/img/b/R29vZ2xl/AVvXsEjfD2rgSYw-xbD44UTW8pTBBP5eJEy4MUy4Cn3hYRJ-eJtA7lO8PSWsUekXxlguJp2-Cu8fMcbkWQNut9VH-vt0-o0rOUQMSc_9uBY7dqe2wxtiqdbyUi31njQpnHNzxMr58LY7AxdaLuU/s1600/wp5.jpg) 0 -25px repeat-x}.showpagePoint{color:#fff;padding:3px 8px;margin:2px;font-weight:700;background:#06a2b9 url(https://blogger.googleusercontent.com/img/b/R29vZ2xl/AVvXsEjfD2rgSYw-xbD44UTW8pTBBP5eJEy4MUy4Cn3hYRJ-eJtA7lO8PSWsUekXxlguJp2-Cu8fMcbkWQNut9VH-vt0-o0rOUQMSc_9uBY7dqe2wxtiqdbyUi31njQpnHNzxMr58LY7AxdaLuU/s1600/wp5.jpg) 0 0 repeat-x;text-decoration:none}.showpageOf{margin:0 5px 0 0} </style>
<script style='text/javascript'>
var postperpage=5;
var numshowpage=3;
var upPageWord="Prev";
var downPageWord="Next";
var home_page="/";
var urlactivepage=location.href;
</script>
<script style='text/javascript' src='http://safir85.ucoz.com/24work-blogspot/page-navigation/0-test-p-n-01_00.js'></script>

Now Drag and drop it after the blog post gadget.

Thank You
read more "Page Number Navigation For Blogspot Site"

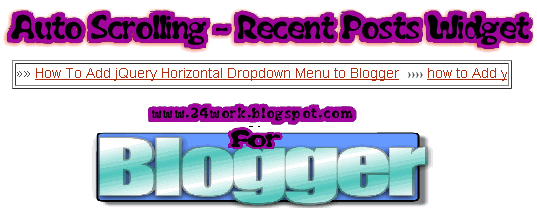
Auto Scrolling Recent Posts Widget For Blogger / Blogspot like this site

If you have a lot of post on the blog, or if you want to show everyone your list of favorite books, but have little space in the sidebar widget this will be a great help to you. This post explains how to add auto scrolling (marquee) recent posts Widget on his blog that looks good on your blogspot blog. This is similar to the display of recent post in your sidebar, but this will have a marquee in this widget. Now if you want to show your blog in this way, either on top or bottom of your blog, then you can use this new widget:


How to Install Auto Scrolling Recent Posts Widget


I have to write two set of instructions for each steps, as some of you are using the default layout, and some of you are using the new layout. So, let's see how to install this cool widget in your blog..

Step 1:

If you're using the old Blogger interface: Go to Dashboard - Design - Page Elements - Add a Gadget.

Add a Gadget of HTML/JavaScript type.

If you're using the new Blogger interface: Go to Dashboard - Layout - Add a Gadget

2.Click on 'Add a Gadget' on the sidebar.

3.Select 'HTML/Javascript' and add the one of code given below

4. Now Click On Save 'JavaScript' You are done.


<a href="http://allitemz.blogspot.com" target="_blank" title="Blogger Widgets"><img src="http://safir85.ucoz.com/24work-blogspot/cursor-24work-10.png" border="0" alt="Blogger Widgets" style="position:absolute; top: 0px; right: 0px;" /></a><script type='text/javascript'>
var w2bWidth="100";
var w2bScrollAmount="10";
var w2bScrollDelay="105";
var w2bDirection="left";
var w2btargetlink="yes";
var w2bnumPosts="5";
var w2bBulletchar =">>>";
var w2bimagebullet="yes";
var w2bimgurl="http://4.bp.blogspot.com/-Dzc4Y6G_iQk/TvngY-SxJiI/AAAAAAAAAvw/Abx5E6KSGkg/s1600/JerryAni.gif";
var w2bfontsize="16";
var w2bbgcolor="FFFFFF";
var w2blinkcolor="FF0000";
var w2blinkhovercolor="3366CC";
</script>
<script type='text/javascript' src='http://safir85.ucoz.com/bdlab-blogspot/24work/scrolling-rece/24work-rpscroller-v3.js' ></script>
<script type='text/javascript' src="http://allitemz.blogspot.com/feeds/posts/default?alt=json-in-script&callback=w2bAdvRecentPostsScrollerv3&max-results=10" ></script>
<noscript><a href="http://24work.blogspot.com">blogger widget</a></noscript>


And now click Save


Thank You !
read more "Auto Scrolling Recent Posts Widget For Blogger / Blogspot like this site"

Random Posts Widget for Blogger / Blogspot

Random Posts Widget For Blogger is great widget. Posts Widget for Blogger is random most popular flash which is useful to increase traffic. make the visitor stay on your site longer and to increase page views posts.Each time updates page of your blog posts widget random change. It can be shown in the sidebar of your blog with or without thumnails.Really this is the jewel of the flash really should show up on his blog.


How to Install this Widget


I have to write two set of instructions for each steps, as some of you are using the default layout, and some of you are using the new layout. So, let's see how to install this cool widget in your blog..

Step 1:
If you're using the old Blogger interface: Go to Dashboard - Design - Page Elements - Add a Gadget.


Add a Gadget of HTML/JavaScript type.


If you're using the new Blogger interface: Go to Dashboard - Layout - Add a Gadget


2.Click on 'Add a Gadget' on the sidebar.

3.Select 'HTML/Javascript' and add the one of code given below

4. Now Click On Save 'JavaScript' You are done.


<a href="http://24work.blogspot.com" target="_blank" title="Blogger Widgets"><img src="http://safir85.ucoz.com/24work-blogspot/cursor-24work-10.png" border="0" alt="Blogger Widgets" style="position:absolute; top: 0px; right: 0px;" /></a><script type="text/javascript">
var randarray = new Array();var l=0;var flag;
var numofpost=5;function randomposts(json){
var total = parseInt(json.feed.openSearch$totalResults.$t,10);
for(i=0;i < numofpost;){flag=0;randarray.length=numofpost;l=Math.floor(Math.random()*total);for(j in randarray){if(l==randarray[j]){ flag=1;}}
if(flag==0&&l!=0){randarray[i++]=l;}}document.write('<ul>');
for(n in randarray){ var p=randarray[n];var entry=json.feed.entry[p-1];
for(k=0; k < entry.link.length; k++){if(entry.link[k].rel=='alternate'){var item = "<li>" + "<a href=" + entry.link[k].href + ">" + entry.title.$t + "</a> </li>";
document.write(item);}}
}document.write('</ul>');}
</script>
<script type='text/javascript' src='/feeds/posts/default?alt=json-in-script&start-index=1&max-results=1000&callback=randomposts'></script>
<a href='http://24work.blogspot.com'><img style='border: 0px' src='https://sites.google.com/site/bdlab12/24work/blogspot%2btutorial.png'/></a><noscript><a href="http://24work.blogspot.com">+ RandomPostsWidgetForBlogger</a></noscript>


And now click Save


Change the the text no in red above in codes to select how many random posts you want to display.


Thank You for reading this article.
read more "Random Posts Widget for Blogger / Blogspot"

Change Blogger Mouse Cursors trix

How do I change my Blogger mouse cursor ? You should know that some people find web pages mouse pointer , cursor cursors , mouse cursor , tumblr cursors , cursors for windows 7 , mouse icon , cursor pointer , free cursor , cursor download. In this tutorial we show you how to easily change the default mouse cursor white something a little more exciting. How To Change Blogger Mouse Cursors In Easy Way.


I take the cursor image from http://www.cursors-4u.com/ and you can change it anytime depends on your festive moods.


How to Install mouse cursor in blogger blog to animated cursors

This tutorial will help you to change the mouse cursor of your blog to animated cursors. As you can see in this blog, i haved installed a dark blue 3d cursor. You can also add it in your blogspot blogs and change it according to your will.


I have to write two set of instructions for each steps, as some of you are using the default layout, and some of you are using the new layout.Backup your template before attempting this tutorial.

Step 1:


In old layout: Go to Dashboard - Design - Edit HTML - Expand Widget Templates.


In new layout: Go to Dashboard - Template - Edit Template HTML - Expand Widget Templates.


Now find (CTRL+F) this code in the template:

</head>

And immediately before it, paste this code:


<style type="text/css">body, a:hover {cursor: url(http://safir85.ucoz.com/24work-blogspot/mouse-cursor/COOL_BLUE_OUTER_GLOW_POINTER-www.24work.blogspot.c.cur), progress;}</style><a href="http://24work.blogspot.com" target="_blank" title="Blogger Widgets"><img src="http://safir85.ucoz.com/24work-blogspot/cursor-24work-10.png" border="0" alt="Blogger Widgets" style="position:absolute; top: 0px; right: 0px;" /></a>


And now click Save Template

Some cursors are give bellow


<style type="text/css">body, a:hover {cursor: url(http://safir85.ucoz.com/24work-blogspot/mouse-cursor/ABU-www.24work.blogspot.com-.cur), progress;}</style><a href="http://24work.blogspot.com" target="_blank" title="Blogger Widgets"><img src="http://safir85.ucoz.com/24work-blogspot/cursor-24work-10.png" border="0" alt="Blogger Widgets" style="position:absolute; top: 0px; right: 0px;" /></a>


<style type="text/css">body, a:hover {cursor: url(http://safir85.ucoz.com/24work-blogspot/mouse-cursor/ANGRY_BIRDS-www.24work.blogspot.com-.cur), progress;}</style><a href="http://24work.blogspot.com" target="_blank" title="Blogger Widgets"><img src="http://safir85.ucoz.com/24work-blogspot/cursor-24work-10.png" border="0" alt="Blogger Widgets" style="position:absolute; top: 0px; right: 0px;" /></a>


<style type="text/css">body, a:hover {cursor: url(http://safir85.ucoz.com/24work-blogspot/mouse-cursor/BATMAN_BEGINS-www.24work.blogspot.com-.cur), progress;}</style><a href="http://24work.blogspot.com" target="_blank" title="Blogger Widgets"><img src="http://safir85.ucoz.com/24work-blogspot/cursor-24work-10.png" border="0" alt="Blogger Widgets" style="position:absolute; top: 0px; right: 0px;" /></a>


<style type="text/css">body, a:hover {cursor: url(http://safir85.ucoz.com/24work-blogspot/mouse-cursor/BLACY_SMILEY-SILLY-www.24work.blogspot.com-.cur), progress;}</style><a href="http://24work.blogspot.com" target="_blank" title="Blogger Widgets"><img src="http://safir85.ucoz.com/24work-blogspot/cursor-24work-10.png" border="0" alt="Blogger Widgets" style="position:absolute; top: 0px; right: 0px;" /></a>


<style type="text/css">body, a:hover {cursor: url(http://safir85.ucoz.com/24work-blogspot/mouse-cursor/BLACY_SMILEY-SUPER_HERO-www.24work.blogspot.com-.cur), progress;}</style><a href="http://24work.blogspot.com" target="_blank" title="Blogger Widgets"><img src="http://safir85.ucoz.com/24work-blogspot/cursor-24work-10.png" border="0" alt="Blogger Widgets" style="position:absolute; top: 0px; right: 0px;" /></a>


<style type="text/css">body, a:hover {cursor: url(http://safir85.ucoz.com/24work-blogspot/mouse-cursor/BUFF-www.24work.blogspot.com-.cur), progress;}</style><a href="http://24work.blogspot.com" target="_blank" title="Blogger Widgets"><img src="http://safir85.ucoz.com/24work-blogspot/cursor-24work-10.png" border="0" alt="Blogger Widgets" style="position:absolute; top: 0px; right: 0px;" /></a>


<style type="text/css">body, a:hover {cursor: url(http://safir85.ucoz.com/24work-blogspot/mouse-cursor/EXCALIBUR-www.24work.blogspot.com-.cur), progress;}</style><a href="http://24work.blogspot.com" target="_blank" title="Blogger Widgets"><img src="http://safir85.ucoz.com/24work-blogspot/cursor-24work-10.png" border="0" alt="Blogger Widgets" style="position:absolute; top: 0px; right: 0px;" /></a>


<style type="text/css">body, a:hover {cursor: url(http://safir85.ucoz.com/24work-blogspot/mouse-cursor/FRUITY_LIME_HEART-www.24work.blogspot.com-.cur), progress;}</style><a href="http://24work.blogspot.com" target="_blank" title="Blogger Widgets"><img src="http://safir85.ucoz.com/24work-blogspot/cursor-24work-10.png" border="0" alt="Blogger Widgets" style="position:absolute; top: 0px; right: 0px;" /></a>


<style type="text/css">body, a:hover {cursor: url(http://safir85.ucoz.com/24work-blogspot/mouse-cursor/GLOWING_HAND_ARMOR-www.24work.blogspot.com-.cur), progress;}</style><a href="http://24work.blogspot.com" target="_blank" title="Blogger Widgets"><img src="http://safir85.ucoz.com/24work-blogspot/cursor-24work-10.png" border="0" alt="Blogger Widgets" style="position:absolute; top: 0px; right: 0px;" /></a>


<style type="text/css">body, a:hover {cursor: url(http://safir85.ucoz.com/24work-blogspot/mouse-cursor/HARRY_POTTER-GOLDEN_SNITCH-www.24work.blogspot.com.cur), progress;}</style><a href="http://24work.blogspot.com" target="_blank" title="Blogger Widgets"><img src="http://safir85.ucoz.com/24work-blogspot/cursor-24work-10.png" border="0" alt="Blogger Widgets" style="position:absolute; top: 0px; right: 0px;" /></a>


<style type="text/css">body, a:hover {cursor: url(http://safir85.ucoz.com/24work-blogspot/mouse-cursor/HEARTLESS-www.24work.blogspot.com-.cur), progress;}</style><a href="http://24work.blogspot.com" target="_blank" title="Blogger Widgets"><img src="http://safir85.ucoz.com/24work-blogspot/cursor-24work-10.png" border="0" alt="Blogger Widgets" style="position:absolute; top: 0px; right: 0px;" /></a>


<style type="text/css">body, a:hover {cursor: url(http://safir85.ucoz.com/24work-blogspot/mouse-cursor/JACK_SKELLINGTON-NIGHTMARE_BEFORE_CHRISTMAS-www.24.cur), progress;}</style><a href="http://24work.blogspot.com" target="_blank" title="Blogger Widgets"><img src="http://safir85.ucoz.com/24work-blogspot/cursor-24work-10.png" border="0" alt="Blogger Widgets" style="position:absolute; top: 0px; right: 0px;" /></a>


<style type="text/css">body, a:hover {cursor: url(http://safir85.ucoz.com/24work-blogspot/mouse-cursor/KINGDOM_HEARTS-UNAVAILABLE-www.24work.blogspot.com.cur), progress;}</style><a href="http://24work.blogspot.com" target="_blank" title="Blogger Widgets"><img src="http://safir85.ucoz.com/24work-blogspot/cursor-24work-10.png" border="0" alt="Blogger Widgets" style="position:absolute; top: 0px; right: 0px;" /></a>


<style type="text/css">body, a:hover {cursor: url(http://safir85.ucoz.com/24work-blogspot/mouse-cursor/LIGHT_BLUE_POINTER-www.24work.blogspot.com-.cur), progress;}</style><a href="http://24work.blogspot.com" target="_blank" title="Blogger Widgets"><img src="http://safir85.ucoz.com/24work-blogspot/cursor-24work-10.png" border="0" alt="Blogger Widgets" style="position:absolute; top: 0px; right: 0px;" /></a>


<style type="text/css">body, a:hover {cursor: url(http://safir85.ucoz.com/24work-blogspot/mouse-cursor/MACE_WINDU_LIGHTSABER-www.24work.blogspot.com-.cur), progress;}</style><a href="http://24work.blogspot.com" target="_blank" title="Blogger Widgets"><img src="http://safir85.ucoz.com/24work-blogspot/cursor-24work-10.png" border="0" alt="Blogger Widgets" style="position:absolute; top: 0px; right: 0px;" /></a>


<style type="text/css">body, a:hover {cursor: url(http://safir85.ucoz.com/24work-blogspot/mouse-cursor/PINK_SKULL_CROSSBONES-www.24work.blogspot.com-.cur), progress;}</style><a href="http://24work.blogspot.com" target="_blank" title="Blogger Widgets"><img src="http://safir85.ucoz.com/24work-blogspot/cursor-24work-10.png" border="0" alt="Blogger Widgets" style="position:absolute; top: 0px; right: 0px;" /></a>


<style type="text/css">body, a:hover {cursor: url(http://safir85.ucoz.com/24work-blogspot/mouse-cursor/REVOLVER-www.24work.blogspot.com-.cur), progress;}</style><a href="http://24work.blogspot.com" target="_blank" title="Blogger Widgets"><img src="http://safir85.ucoz.com/24work-blogspot/cursor-24work-10.png" border="0" alt="Blogger Widgets" style="position:absolute; top: 0px; right: 0px;" /></a>


<style type="text/css">body, a:hover {cursor: url(http://safir85.ucoz.com/24work-blogspot/mouse-cursor/ROCK_ON-www.24work.blogspot.com-.cur), progress;}</style><a href="http://24work.blogspot.com" target="_blank" title="Blogger Widgets"><img src="http://safir85.ucoz.com/24work-blogspot/cursor-24work-10.png" border="0" alt="Blogger Widgets" style="position:absolute; top: 0px; right: 0px;" /></a>


<style type="text/css">body, a:hover {cursor: url(http://safir85.ucoz.com/24work-blogspot/mouse-cursor/TOAD-MARIO_WORLD_LINK_SELECT-www.24work.blogspot.c.cur), progress;}</style><a href="http://24work.blogspot.com" target="_blank" title="Blogger Widgets"><img src="http://safir85.ucoz.com/24work-blogspot/cursor-24work-10.png" border="0" alt="Blogger Widgets" style="position:absolute; top: 0px; right: 0px;" /></a>


<style type="text/css">body, a:hover {cursor: url(http://safir85.ucoz.com/24work-blogspot/mouse-cursor/TWILIGHT_BREAKING_DAWN-www.24work.blogspot.com-.cur), progress;}</style><a href="http://24work.blogspot.com" target="_blank" title="Blogger Widgets"><img src="http://safir85.ucoz.com/24work-blogspot/cursor-24work-10.png" border="0" alt="Blogger Widgets" style="position:absolute; top: 0px; right: 0px;" /></a>


read more "Change Blogger Mouse Cursors trix"
Related Posts Plugin for WordPress, Blogger...
 

Alexa Rank

Review www.allitemz.blogspot.com on alexa.com

Total Pageviews

Your IP

what is my ip address?
back to top